Setting up a Steel Hammock Stand provides an immediate upgrade in durability and weight capacity over traditional wooden alternatives. However, realizing this full potential depends entirely on correct assembly techniques and proactive rust management. Poor installation directly causes structural instability. This manifests as dangerous wobbling and irreversibly stripped hardware. Furthermore, neglecting basic maintenance allows ground moisture and ambient humidity to silently compromise the steel frame over time. You deserve a relaxing outdoor experience without worrying about sudden collapses or rapid corrosion.
This guide provides an evidence-based roadmap for erecting your stand safely and efficiently. We will explore how to evaluate your setup site, properly audit your hardware, and optimize hanging tension for maximum comfort. You will also learn practical, seasonal maintenance routines. These routines dramatically extend the functional lifespan of your outdoor investment, ensuring years of safe, reliable use.
Key Takeaways
- Assembly sequencing matters: Always build from the base upward, keeping hardware hand-tightened until the frame is fully aligned to prevent thread stripping.
- Placement dictates longevity: Setting up on hard, level surfaces prevents uneven load distribution and minimizes ground-moisture exposure.
- Powder coating isn't invincible: Routine inspections for micro-scratches—and prompt touch-ups—are mandatory to prevent localized oxidation (rust).
- Seasonal storage is non-negotiable in extreme climates: Prolonged exposure to freezing temperatures or heavy rain will degrade even high-grade steel components.
Pre-Assembly: Site Evaluation and Hardware Auditing
A successful setup begins long before you connect the first two tubes. Ensuring your physical footprint is safe and level establishes the foundation for long-term stability. The site must support dynamic weight loads without risking dangerous tipping or gradual sinking into the earth. You must carefully evaluate the environment where the frame will reside.
Site Selection Reality Check
First, evaluate the ground density of your chosen location. Soft soil poses a significant risk to heavy metal frames. When subjected to body weight, narrow metal feet easily puncture soft turf or damp earth. This sinking creates uneven weight distribution. Uneven distribution stresses the welded joints and increases the likelihood of a structural failure. If you must set up on grass, place solid, load-distributing pads beneath the feet.
Next, map out the swinging radius. You need ample space to move safely. Ensure a minimum clearance of two to three feet around the entire perimeter. This buffer zone prevents accidental collisions during use. It also keeps the fabric away from abrasive surfaces like brick walls or thorny bushes.
| Surface Type | Stability Level | Required Action Before Setup |
| Concrete Patio | High | Ensure the surface is level; use rubber foot caps to prevent scratching. |
| Wooden Deck | High | Verify deck boards can support the concentrated point load. |
| Packed Dirt/Gravel | Medium | Rake level and clear large rocks to prevent uneven footing. |
| Soft Lawn/Turf | Low | Install flat pavers or load-distributing pads under each contact point. |
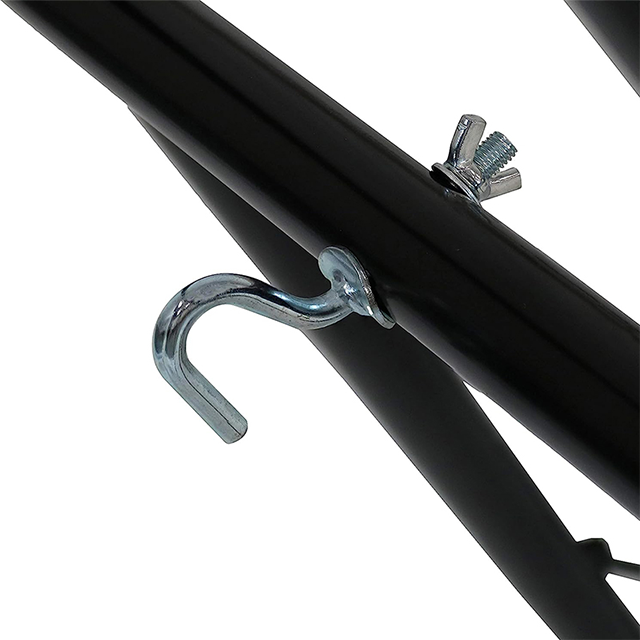
The Hardware Audit
Before twisting a single bolt, inventory all parts against the included instruction manual. Missing components often stall the building process midway. Lay every piece out on a clean, dry surface. Inspect the zinc-plated or stainless steel hardware closely for factory defects. Look specifically for metal burrs on the bolt threads. A burr easily ruins the internal threading of a receiving nut.
Acknowledge common manufacturing realities. Missing washers or slightly damaged snap-buttons occasionally happen during packaging. However, never bypass using a washer if the manual specifies one. Washers serve a critical engineering purpose. They distribute the clamping load of the bolt and prevent damaging metal-on-metal friction. Skipping a washer accelerates wear and compromises joint integrity over time.
![Steel Hammock Stand Assembly]()
Step-by-Step Steel Hammock Stand Assembly
Implementing a standardized protocol guarantees a secure structure. This systematic approach applies to both tool-required models and modern tool-free designs. Rushing the construction often leads to misalignment. Follow these sequential phases to ensure maximum structural integrity.
Phase 1: The Foundation
Always begin by connecting the horizontal base tubes. This bottom section carries the entire load of the unit. If you own a tool-free model, slide the pieces together carefully. Ensure the push-pins fully pop through the designated holes and lock securely into place. You should hear a distinct click. For bolt-together models, insert the hardware so the bolt heads sit flush against the outer tubing. Do not tighten anything down fully yet.
Phase 2: Uprights and Y-Brackets
Next, attach the diagonal support arms, often referred to as Y-brackets or uprights. These components dictate the overall height and tension capability. Here is a crucial, experience-based tip: do not apply maximum torque to the bolts during this phase. Leave roughly a 10% tolerance in the hardware tightness. Leaving the bolts slightly loose allows the entire metal frame to flex. This vital flexibility helps you easily align and insert the final connection pieces without forcing them.
Phase 3: Final Torquing and Stability Check
Once you fully construct the entire skeleton, begin the final tightening sequence. Move systematically from the bottom joints upward. Apply firm pressure to secure every bolt. After tightening, you must perform a strict stability test before hanging the fabric bed. Stand next to the unit and apply heavy, downward pressure onto the center of the base track. The frame should feel entirely solid. If you detect any wobbling or listing, stop immediately. Recheck the ground level and verify every joint connection.
Portability Considerations
Many users transport their gear for weekend camping trips. If you utilize a portable design, establish a strict sequence for quick breakdown. Reverse the assembly steps exactly. Store all small hardware components inside a dedicated, weather-proof pouch. Taping this pouch directly to one of the main tubes prevents lost pieces during transit.
Rigging and Safety: Achieving a Balanced, Stable Swing
Understanding your equipment's structural limits translates directly into safe daily usage. Properly rigging the fabric bed determines both your physical comfort and the longevity of the metal supports.
Setting the Tension
Aim for an optimal hanging angle of roughly 30 degrees. This specific geometry distributes your body weight perfectly across the suspension points. Fabric strung too tightly creates massive lateral stress on the vertical uprights. Over time, this horizontal pulling force causes the steel tubes to bend inward. Conversely, fabric strung too loosely results in bottoming out. Scraping the base bar damages the fabric and creates an uncomfortable resting position.
Materials behave differently over time. Cotton and nylon beds inevitably stretch after several weeks of continuous use. Use adjustable chain links or heavy-duty carabiners to modify the tension. Moving the connection point up by just one or two chain links quickly restores the ideal 30-degree hanging geometry.
Swinging Dynamics (Mitigating Risk)
You must address the physical reality of lateral force. Manufacturers engineer these structures primarily for vertical downward loads and gentle, linear rocking. They do not design them for aggressive, playground-style swinging. Excessive lateral movement creates dangerous torque at the base welds.
- Limit side-to-side motion: Keep your swinging motion gentle and strictly parallel to the central base bar.
- Monitor weld stress: Aggressive swinging induces metal fatigue at the lowest connection points.
- Prevent tipping hazards: High-amplitude swinging shifts the center of gravity outside the footprint, risking an immediate rollover.
Preventative Maintenance: Protecting Steel from Rust and Wear
The primary enemy of any outdoor metal structure is moisture infiltration. Water attacks the unprotected joints and exploits microscopic scratches on the external coating. Implementing a proactive defense strategy keeps the frame structurally sound and visually appealing.
Routine Inspection Framework
Conduct a thorough inspection of the entire unit every quarter. Look closely for micro-scratches along the lower bars. Lawnmowers, pet claws, and repositioning the unit frequently cause these tiny abrasions. Once the raw metal breathes, oxidation begins rapidly. Inspect every hardware connection point. Bolts and push-pins represent the most vulnerable areas for early signs of rust.
| Maintenance Task | Frequency | Purpose / Benefit |
| Visual scratch inspection | Quarterly | Identify exposed metal before deep oxidation occurs. |
| Hardware tightness check | Monthly | Prevent joint loosening caused by daily rocking vibrations. |
| Joint lubrication | Bi-Annually | Keep push-pins springy and prevent metal friction squeaks. |
| Clear drainage holes | Monthly | Allow trapped internal condensation to escape freely. |
Rust Mitigation Tactics
When you discover early rust spots, act immediately. Use a stiff wire brush to scrub away the surface oxidation. You must remove all flaky material to expose the bare metal underneath. Next, apply a high-quality, rust-inhibiting primer to the cleaned area. Follow this primer application using an exterior-grade enamel touch-up paint. Matching the original color closely maintains a clean aesthetic.
Joint lubrication requires specific products. Apply a dry silicone spray lubricant directly to the snap-buttons and bolt threads. Dry silicone leaves a slick film without remaining tacky. Avoid using heavy, wet greases. Thick grease acts like a magnet for environmental dirt, pollen, and abrasive grit. This trapped grit grinds down the metal over time.
Managing Internal Condensation
Acknowledge the reality of temperature fluctuations. Hollow metal tubes naturally trap internal condensation as daytime heat transitions into cool evening air. Manufacturers drill small drainage holes at the lowest points of the base to combat this moisture. Ensure these factory-drilled weep holes remain completely clear of mud, grass clippings, or insect nests. Blocked holes allow standing water to rust the frame from the inside out.
Seasonal Storage and Lifecycle Management
Managing this asset over multiple years maximizes its functional lifespan. Proper winterization strategies dictate how well the material survives the harsh off-season.
Winterization Protocol
In regions experiencing freezing snow or continuous heavy rain, you must disassemble the unit completely. Freezing water expands powerfully. If moisture pools inside the joints and freezes, it will split the metal tubing. Break down the frame into its core components.
Before storing the pieces, wipe down all surfaces using a dry, clean microfiber cloth. Microfiber effectively removes lingering morning dew and acidic bird droppings without scratching the finish. Store the disassembled poles in a climate-controlled environment. A dry basement or an insulated garage provides excellent protection against ambient winter humidity.
The "Leave It Outside" Compromise
Sometimes, total disassembly proves impossible due to space constraints. If you must leave the setup outdoors year-round, invest immediately in a heavy-duty, waterproof cover. Choose a cover featuring built-in mesh vents. These vents provide necessary breathability.
We must present a transparent claim regarding this compromise. Even covering the unit perfectly cannot replicate the protection of indoor storage. Ambient ground humidity rises and becomes trapped under the canopy. This micro-climate eventually accelerates wear on the exposed metal. If you choose this route, double your frequency of rust inspections during the spring thaw.
Conclusion
A well-made Steel Hammock Stand serves as a remarkably low-maintenance, high-yield addition to your outdoor living space. However, this remains true only if you assemble it carefully and protect it actively from compounding moisture damage. Proper site selection, measured torque during assembly, and quarterly rust mitigation form the pillars of equipment longevity.
For buyers still evaluating their options, prioritize specific features to ensure long-term satisfaction. Look for stands featuring thick powder-coated finishes and heavy-gauge tubing. Additionally, prioritize tool-free, snap-button assembly systems. These push-pin designs make seasonal storage and relocation significantly easier.
Take action today to protect your relaxation space. Review your specific model's weight capacity limits, browse for breathable protective covers, and ensure your fabric bed matches the frame's dimensions perfectly. A little proactive effort guarantees countless hours of secure, comfortable swaying.
FAQ
Q: Can I leave my steel hammock stand outside year-round?
A: While powder-coated steel offers strong weather resistance, continuous exposure to harsh winters or coastal salt air significantly reduces its lifespan. Seasonal indoor storage is highly recommended to prevent irreversible corrosion.
Q: How do I stop my metal hammock stand from squeaking?
A: Squeaking typically originates from metal-on-metal friction located at the S-hooks or the main connection joints. Applying a dry silicone lubricant directly to these specific contact points quickly resolves the irritating noise.
Q: Are replacement parts available if a steel tube bends or rusts out?
A: This depends heavily on the specific manufacturer. High-quality brands often sell replacement hardware kits or individual structural poles. This prevents you from needing to replace the entire unit. Always check your warranty coverage first.
Q: How do I know if my stand is safely assembled?
A: Before sitting down, ensure all push-buttons fully extend through their corresponding holes. Verify all bolts feel tight and secure. Finally, press down firmly on the center base bar; the unit should not rock, lift, or wobble.