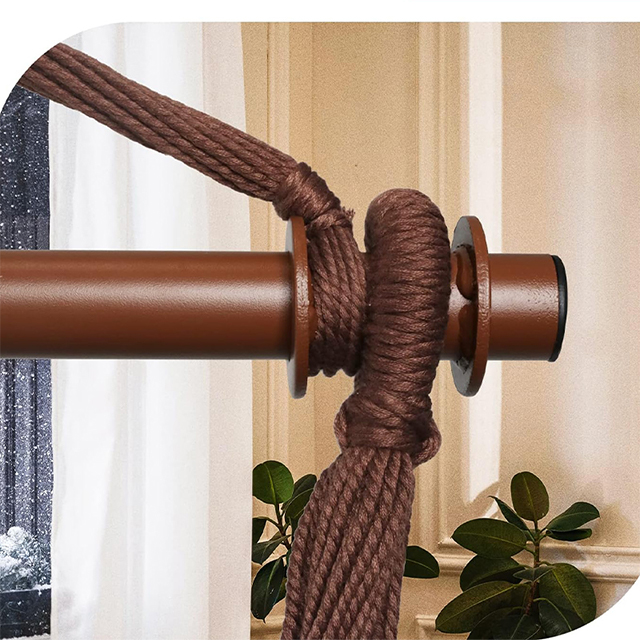
Installing a hanging chair requires more than just finding a spot you like—it requires structural certainty. We often visualize a perfect corner for relaxation, but gravity demands respect. A falling incident or property damage is the primary concern preventing users from enjoying a suspended seating experience. Ripped drywall, shattered ceiling joists, and serious injuries happen when enthusiasm outpaces basic engineering principles. You need absolute peace of mind before you can truly relax. This guide provides a strictly evidence-based, safety-first framework for assessing your space. We will show you how to select the proper heavy-duty hardware. You will also learn to mount a Bar Hammock Chair securely in any environment. Our methods cover essential weight physics, exact tooling requirements, and clear step-by-step installation methods. Follow these guidelines closely to ensure a flawless and secure setup.
Key Takeaways
- Drywall is never sufficient: Indoor installations must anchor directly into the exact center of a solid wood ceiling joist or concrete ceiling.
- Dynamic weight matters: Hardware and structural supports must be rated for at least 300-500 lbs to account for the force of sitting down (dynamic load), not just static resting weight.
- Hardware dictates safety: Rely exclusively on heavy-duty lag screws, specialized suspension kits, and 360-degree swivels to prevent mechanical failure and strap friction.
- Clearance is non-negotiable: Minimum clearance requires 20–24 inches of space from the floor and at least 3 feet of radius from adjacent walls or obstacles.
Evaluating Your Space: Structural Prerequisites and Load-Bearing Realities
Physics dictate how we suspend furniture safely. Resting weight differs heavily from dropping weight. A 200-pound user falling into a seat generates intense sudden force. We call this a dynamic load. Anchor points must tolerate a minimum 400-pound working load limit (WLL). We must evaluate indoor and outdoor spaces carefully before drilling a single hole.
| Load Metric | Definition | Suspension Impact | Safety Requirement |
| Static Load | The resting, stationary weight of an object or person. | Predictable and steady downward stress on hardware. | Basic capacity rating verification. |
| Dynamic Load | Force generated by sudden movement, swinging, or dropping. | Multiplies baseline weight forces up to 2x or 3x. | High Working Load Limit (WLL) structural anchors. |
Indoor Structural Assessment (Go/No-Go Criteria)
Wood joists serve as the standard foundation for indoor mounts. They must remain accessible and structurally sound. Minimum framing dimensions require a 2x6 inch solid wood joist. Anything smaller risks splitting under dynamic tension.
Concrete ceilings demand specialized masonry anchors. Standard screws fail instantly in masonry. We automatically disqualify hollow bricks or crumbling plaster. These materials possess zero tensile strength. Renters face strict constraints regarding drilling heavy structural holes. Landlords rarely permit massive lag screws in ceiling joists. A freestanding stand often becomes the only viable alternative for apartment living.
Outdoor Structural Assessment
Trees offer fantastic natural hanging spots. Always assess branch health thoroughly first. You need living hardwood branches like oak, maple, or hickory. Softwoods like pine snap unpredictably. Branches should measure at least 6 to 8 inches in diameter.
Porches and pergolas provide excellent overhead options. You must verify exposed beams are truly structural. They must bear heavy loads. Do not hang hardware from mere decorative fascia boards. Fascia boards exist only for aesthetics and easily detach under weight.
Shortlisting Suspension Hardware: What Actually Keeps You Safe
Avoid cheap hardware store substitutes entirely. Generic eye-hooks fail terribly under human suspension. Manufacturers design them for hanging plants or light fixtures. They easily bend open or pull out under dynamic stress. Proper hardware actually keeps you safe. You need specific kits optimized for indoor and outdoor setups.
The Essential Indoor Hardware Kit
Your indoor kit needs specialized heavy-duty components. Use a thick pad eye plate or a dedicated ceiling mount. Secure it using stainless steel lag screws. They must measure at least 3 inches long to penetrate the joist deeply. Connect everything using climbing-rated or heavy-duty steel carabiners. Auto-locking carabiners offer the highest security level.
You also need a 360-degree swivel. Explain why this is mandatory? It prevents the suspension rope from unwinding. Without a swivel, your ropes twist tightly as you spin. This binds the fibers and eventually snaps them under tension. A quality bearing swivel allows frictionless rotation.
The Essential Outdoor Hardware Kit
Trees require wide, weather-resistant polyester straps. Broad straps prevent girdling. They distribute weight evenly and protect the bark from tearing. Use stainless steel chains for quick height adjustments. UV-treated suspension ropes also work well against sun damage. Standard nylon degrades rapidly under direct sunlight.
| Environment | Primary Anchor Type | Linkage Connector | Essential Safety Feature |
| Indoor Ceiling | Lag screws & Pad eye plate | Steel locking carabiner | 360-degree bearing swivel |
| Outdoor (Tree) | Polyester tree straps | Climbing carabiner | Bark-protecting wide webbing |
| Outdoor (Beam) | Bolt-through hardware | Stainless steel chain | Weather-resistant coating |
![Indoor and Outdoor Bar Hammock Chair Installation Layout]()
Step-by-Step Indoor Installation: Anchoring to Ceiling Joists
Precision matters heavily when anchoring to ceiling joists. Following these exact steps guarantees a flawless indoor setup. Rushing the process leads to dangerous structural mistakes.
Step 1: Locating the Exact Center (The Most Critical Step)
This represents the most critical phase of installation. Use a high-quality electronic stud finder. Locate both outer edges of the ceiling joist. Mark them clearly using a pencil. You must verify your center point using the "small nail test."
- Hammer a tiny finishing nail into your marked center.
- Feel for consistent, deep resistance indicating solid wood.
- Tap slightly to the left and right to confirm the joist boundaries.
- Ensure you hit dead center. Grazing the side causes lag screw pull-out.
Step 2: Drilling Pilot Holes
You must always pre-drill holes. Specify pilot hole sizing relative to your chosen lag screw. The drill bit should be slightly smaller than the screw threads. For example, use a 1/4 inch bit for a 5/16 inch screw. Proper sizing prevents old wood from splitting. Detail drill depth requirements based on hardware specs. Typically, drill down exactly the length of the screw shaft.
Step 3: Mounting and Securing
Align your pad eye plate over the pilot holes. Drive the lag screws flush using a proper socket wrench. Go slowly and apply steady pressure. Do not overtighten the bolts. Overtightening strips the wood fibers instantly. Stripped wood loses its gripping strength entirely, rendering the anchor useless.
Step 4: Height Calibration
Attach your chain or rope to the secure mount. Clip the swivel mechanism on securely. Hang your Bar Hammock Chair from the lower swivel loop. Adjust the linkages carefully. Calibrate the height so the bottom of the chair sits 20–24 inches off the floor when fully loaded.
Step-by-Step Outdoor Installation: Trees, Beams, and Stands
Nature and outdoor architecture provide excellent mounting points. We just need to adapt our mounting methods appropriately. Outdoor environments introduce weather and natural growth variables.
Method A: The Tree Branch Mount
Find a robust, healthy hardwood branch. Throw your protective tree strap directly over the selected branch. Thread one end of the strap through its own sewn loop. Pull it tight against the wood to choke the branch securely. Attach your heavy-duty carabiner to the free loops.
Trust your safety check here. We must warn against using ropes directly on tree bark. Direct rope friction cuts into the cambium layer. This kills the tree slowly. It also creates dangerous friction wear on your rope, leading to a sudden snap.
Method B: Exposed Porch Beams
Porch beams share a similar protocol to indoor ceiling joists. Wrap them using a strong polyester strap if you prefer avoiding drills. Wrapping preserves the structural integrity of the wood. You can also use a direct bolt-through method. Bolt-through methods work exceptionally well for square structural beams. You drill entirely through the beam, securing the mount using heavy carriage bolts and locking nuts.
Method C: Freestanding Stands (The Low-Risk Alternative)
Freestanding stands act as the ultimate low-risk alternative. Briefly evaluate when to pivot to a C-stand or A-frame stand. Failing structural checks means you absolutely need a stand. Needing portability also justifies a stand purchase. Highlight footprint requirements carefully. Most heavy-duty stands need a stable 4x4 foot floor space minimum. They require perfectly level ground to prevent tipping.
The "Drop Test" and Ongoing Maintenance
Installation success requires immediate validation and ongoing testing. Never assume a newly installed anchor holds perfectly forever. Environmental shifts and repeated dynamic loading loosen hardware.
The Progressive Weight Test
Do not sit immediately. Stand next to the setup first. Grab the hardware and pull down using your full body weight while standing firmly on the ground. Next, place heavy objects inside the seat. Use large books, gym weights, or sandbags.
Listen closely while applying pressure. Structural creaking indicates framing trouble. Drywall cracking signals joist movement or flexing. Hardware shifting means bolts are loose or stripping. Stop and reassess immediately if you notice any of these signs.
Long-Term Security Audits
Routine checks keep you safe over the years.
- Check lag screws for loosening every 3 to 6 months.
- Inspect suspension ropes for fraying fibers or UV discoloration.
- Check carabiners for metal fatigue, sticky gates, or surface rust.
- Monitor tree branches for signs of rot or insect damage.
Outdoor setups require extra vigilance regarding weather exposure. We highly advise bringing outdoor fabric inside during harsh weather. Untreated wooden spreader bars also degrade outside. Bring them indoors to prevent rapid wood rot.
Conclusion
Installing suspended seating remains a straightforward process. You simply prioritize structural realities over easy shortcuts. High-quality hardware guarantees long-term enjoyment without anxiety. Do not compromise on fastener quality or joist centering. A securely mounted chair provides unparalleled comfort.
Take action on these final steps:
- Evaluate your chosen installation space today using strict load-bearing criteria.
- Browse certified suspension kits rated for high dynamic loads.
- Invest in structural freestanding stands if your environment fails safety checks.
- Set calendar reminders for your seasonal hardware safety audits.
FAQ
Q: Can I hang a bar hammock chair from a drywall ceiling?
A: Emphatically no. Drywall possesses zero structural strength. It crumbles immediately under human weight. You must anchor directly into a solid wood ceiling joist or structural concrete. The ceiling material simply hides the true load-bearing framing underneath. Relying on drywall toggles guarantees a dangerous fall.
Q: How much weight can a ceiling joist actually hold?
A: A standard 2x6 inch ceiling joist in good condition easily supports 300 to 500 lbs of dynamic weight. This capacity comfortably exceeds standard seating requirements. Ensure you install hardware exactly dead center into the wood to maximize this holding power.
Q: What if I can't find a stud or joist where I want to hang it?
A: You can bridge two adjacent ceiling joists. Secure a heavy 2x6 board across both joists using thick lag screws. You then mount your chair hardware to the exact center of that sturdy spanning board. Alternatively, purchase a freestanding structural stand.
Q: How high should the chair be off the ground?
A: The standard benchmark requires 20 to 24 inches of clearance from the floor to the lowest point of the loaded seat. This height allows your feet to touch the ground comfortably. It ensures you can get in and out safely without tipping.